Tuesday, December 08, 2009

i miss being this hardcore

This is me looking hardcore. Yes, that is a rock I am standing on with only a huge crevasse below. Yes, I just completed the Inca Trail.
It's been two years since I hiked the Inca Trail to Manchu Picchu and proved just how hardcore I was. I recently looked through the pictures of this amazing trip and remembered just how incredible it was. Hiking through the Andes (over several mountains), not showering for days, laughing each time my lungs decided to stop breathing (okay, I laughed about it later), seeing the incredible views as we hiked up and over each mountain, listening to our philosopher/poet guide talk about the flora and fauna, and make some of the best memories with my dear friend Joc as we treked to the top together.
Yes, this is a picture of Manchu Picchu that I took. Our friend Todd heroically ran to the top of this crazy high peak to get the passports from our other friends so we could get train tickets. I graciously held his camera while he ran and took about 700 pictures. In return, I gave him my energy bar and water bottle when he got back. A fair trade.
Yes, this is me standing next to a llama on a cliff at Machu Picchu. Yes, it almost kicked me off.
Yes, this is me hiking the Inca Trail (you can see the trail coming down out of the jungle). Yes, I haven't showered in three days. Yes, I wore those pants every day for four days. I am that hardcore.

Monday, November 16, 2009

fondant

For anyone wanting to venture out into the land of fondant, here is a great recipe and instructions: http://whatscookingamerica.net/PegW/Fondant.htm.

Marshmallow Fondant
16 ounces white mini-marshmallows (use a name brand - quality does matter)
2-5 T water
2 lbs powdered sugar (use a name brand)
1/2 c shortening

First you melt the marshmallows and the water in the microwave slowly (30 seconds at a time) so that it melts without overheating. When you dump 3/4 of the sugar on a WELL greased counter top and pour the melted marshmallows on top. With your hands well greased (just embrace the Crisco at this point, trust me) start to kneed the marshmallow mixture, remembering to pause to re-grease your hands. Kneed for 5-8 minutes until nice and uniform.

I failed to re-grease my hands, so a few minutes in I was a marshmallow mess, which caused me to get marshmallow cream all over my kitchen because I couldn't it off my hands. I recommend re-greasing every 2 minutes as you kneed, even if it isn't sticking yet. Because once you notice the sticking, you are too late.

After letting the fondant sit in the fridge for 2 hours (well greased in a zip-lock bag), it was perfect to be rolled out and put on the cake. I was really impressed with how easy this was to make and how managed it was.

Friday, November 13, 2009

creamy tomato soup


I love eating soups in the fall when the weather turns cold and you just want something warm for dinner. Last night I made one of my favorite soup recipes while throwing together some carrot cake cupcakes for next week. This soup is my absolute favorite tomato soup recipe and very simple to make. Enjoy!
Creamy Tomato Soup
⅓ c red onion, diced (you can also use a yellow onion)
1-2 T olive oil
1 T garlic, minced
4 c chicken broth (you can also use chicken bouillon and water)
2 cans peeled, diced tomatoes
8 oz tomato sauce
8 oz cream
fresh basil
fresh parmesan

Sauté onion in oil for 5 minutes. Add garlic and sauté for 1 minute. Add chicken broth, tomatoes, and tomato sauce. Bring to a boil. Add cream and cook for 10 minutes. Add salt and pepper to taste. Serve topped with fresh basil (cut into strips) and parmesan cheese (grated on top).

Monday, November 09, 2009

ikea miracles

After spending two hours in the car trying to get to Ikea when it should have taken 40 minutes (thank you, poorly designed Boston roads), my friend Sarah and I hopped out of the car excited for our Ikea shopping trip. She recently moved into a new apartment, so we were on the hunt for curtains and some artwork for her walls. We planned to head to Ikea on Friday night after her husband got home and after my eye appointment was over. Despite the fact that I couldn't read anything close up, thanks to dilated eyes, I was thrilled to be heading to Ikea.

We first stopped off for some sustenance (hot dogs and chips) and ate our dinner while winding through the top floor displays. Every few minutes we would find a trash can and dispose of a wrapper or napkin. Sarah made a comment about us being like Hansel and Gretel, leaving little crumbs along our path. Quite apt actually.

By the time we were on the second floor, we were on a roll finding great curtains for her living room, the perfect curtain rods, and some new lights for my dining area. Although the real fun started when we moved into the As-Is area near the checkout. If you have ever ventured into this area, you are in for a real treat. Sometimes there is not a lot to look at, but this time we really scored.

At first I kind of wandered around seeing if there was anything of potential. Then I spotted on some great colored textiles, so I went over to sort through the random textiles in large bins. I found my beautiful curtains at Ikea this way over two years ago, so I was hopeful. The first great find was a queen size linen duvet, that was the exact same color of Sarah's curtains for only $5. This meant we put back her $30 drapes and got this duvet instead. We are going to cut it into four panels and make them into curtains for her dining room. Total cost: $5.

After I found this great duvet (which some other guy wanted, but I was already holding), I spotted a huge red pile of fabric. After a fellow shopper overhead me asking myself what this could possibly be, she helped me hold it up (it was way too big for one person to hold) and we found out it was a huge L-shaped couch cover. It was a beautiful cherry red color and the fabric was very thick (not a thin, cheap cover). I then found matching couch cushions and realized that this could cover my current love seat quite well. Sarah and I measured the red cushions while I had my husband at home measure our couch and we soon realized I could totally pull this off. So we picked out two back and two bottom cushions and threw them in our already full cart. Total cost for extra large cover and four cushions: $24.

One last textile that caught my attention was a beautiful yellow corduroy fabric. We pulled it out of the bin and saw that it was a pretty big chair cover and would be great to cut up and make into pillow cases and cushions. Total cost: $9.

For awhile I have been looking something I could paint in chalkboard paint and use in my kitchen to write down groceries. Mirrors and frames were too expensive for something that I was going to paint over, so when I walked past some returned cupboard fronts, I was inspired. A lot of the cupboards had molding, so I could tape off the molding and then paint the inside square chalkboard for an instant framed chalkboard. Sarah and I hunted through the stack of returned boards to find the perfect square for my kitchen and a large rectangle for her currently empty kitchen wall. Total cost for mine: $5. Sarah's total cost: $9 (for two boards).

When we got back to my apartment, we quickly threw off my old cushion covers and put the red ones on to see if they would fit, and it was a perfect fit. The bottom cushions were about one inch too big, so I took my bread knife to the cushions and shaved off an inch so they would fit. Saturday morning I cut the middle corner section out of the cover, which left two arm sections. I then sewed them together, which was the perfect size for my love seat. With some leftover fabric sitting in my sewing corner I made a black and white polka dot throw pillow with red buttons.

I still need to take pictures of the new couch. The Ikea couch originally costs $899, so getting the cover for $24 was a steal. I found a tiny whole in the cover where the stitching had come undone, but sewed it up in a minute. Ben never liked the color of the couch, but we were about to spend a few hundred dollars to replace it, since structurally it is fine. I also added to bed pillow to the back cushion to give it more support. I bought this couch for $50 four years ago, so the batting in the back cushions was definitely losing its support. And now we have a brand new couch for $24.

Wednesday, November 04, 2009

hair cutting tips

As a self-taught hair stylist, I picked up most of my hair cutting knowledge by seeing and a lot of doing. After watching a few hair cuts, I was able to pick up on some tricks of the trade (and best methods to thin/texturize). And after having my own hair cut every few months by different people who are just learning, I have learned which angle to hold the scissors for the best layers, what kind of texturizing works on my hair, and to NEVER EVER cut the hair near my face. If you have ever cut my hair, you know what I am talking about.

So here is a random list of hair cutting tips for anyone who wants to learn a new skill or is just plain curious:

1. When in doubt, comb.
Nothing helps you more when you are trying to get a very even bottom or layer than to re-comb the hair a few times and then look at it. You would be shocked how many times you can cut a very straight line, only to comb the hair and find numerous longer hairs who were hiding. If something isn't working, take a moment to re-wet any drying hair and comb the entire head several times to get everything laying straight.

2. Hair cutting scissors really do matter.
I have never owned a professional grade of hair cutting scissors, but even if you are cutting your husbands hair or trimming your bangs, you should buy a cheap hair cutting scissor. Trust me, it really helps make a clean cut. I recommend getting a pair for $7-10 at target (in the aisle with the hair pins and elastics).

3. Almost always texture layers.
Adding a little bit of texture on layers helps enormously. The only times I don't texture hair is when either they have super thin/fine hair or if they want a very blunt cut. But for most long layered hair styles or short hair styles, texturizing always helps. It helps the layer blend without going too short or becoming too choppy. Whenever I am getting my hair cut and something just isn't blending, I tell the person to stop layering and just texturize that area. It almost always fixes the problem and keeps the person from cutting something way too short.

4. Texturize by cutting up into the hair. Never use texturizing sheers.
For anyone who has been scarred by texturizing sheers (like when a stylist cuts one inch from your scalp, so that you have all these little hair sticking up), you know that you hate them. NEVER LET SOMEONE USE THESE ON YOUR HAIR. Instead have them use regular sheers and cut up into the ends of the hair.


5. Be aware of where you part the hair.
If you always part your hair on the same side, I recommend cutting the hair on that part so that the hair around your face will look even. If you don't like it when one stray hair falls to the wrong side, I usually trim a few of the longest pieces near the part, so that if they are on the other side one day they won't stand out.

6. Cut less length off to start with.
Hair always shortens a little when it dries, so be careful when cutting a lot of length off. I usually cut a little on the safer side, and then have the person look at the length. I am more than willing to cut another half-inch or inch off the bottom, but you don't to cut it too short from the start. Also be aware that you often have to take a tiny bit off the length to even it, so just go easy at first.

7. Never cut bangs straight across.
Bangs almost always need a little texturizing at the ends. I usually cut them longer than I want them, and then texturize them to get them the right length. If you cut them the right length and then texturize, then you might end up with a bang that is too short.

8. Use clippers sparingly on men.
Yes, clippers (or buzzers) are great when cutting men's hair. But I only use them around the neck and back of the head. If you use them all over the head, then it tends to look like they are in grade school. I recommend using these to get a clean cut around their neck where it is short and then use scissors to cut the sides and top of the head.

9. Visualize layers to get an idea of how much to cut off to get the right angle or length.
I admit that this part takes either a talent for a good eye or a lot of practice. But be aware that it really matters what angle you cut when you are doing layers, how much you cut, and where the hair is going to fall on the head. I often show people to pinch the hair where they think they want to cut it and then pull it back down towards the head to see where it hits. Doing this several times with different angles helps you get an idea of the end result. Also be aware that most people have very thick hair on the tops of their head and it thins out on the bottom. So often you need to cut at a different angle near the bottom so that the layers aren't top heavy.

10. Watching really helps.
Some of my best learning experiences were when I watched extremely closely while my hair was being cut to see the kind of angles the stylist used, how she texturized my hair, and how she blended the layers. I recommend watching very closely while you are at the salon and asking lots of questions along the way.

Monday, October 26, 2009

spud nuts

If you haven't tried homemade potato donuts (aka spud nuts), you really have to try them. After talking with a friend last week about how much we like donuts, we decided that making some donuts and playing games would be a great fall activity.

I pulled out the family spud nut recipe last night and decided to half it, since there were only going to be a few of us. This turned out to be a good decision, since a half of the recipe made over 3 dozen donuts.

Spud Nuts

5 ¼ T yeast
¾ c warm water
1 ½ T sugar
3 c milk
3 t salt
¾ c sugar
3 eggs
½ c oil
1 ½ c mashed potatoes
9 c flour
oil to fry

Dissolve yeast in water and sugar. Add wet ingredients and stir. Beat in half of flour. Add flour until soft dough consistency. Let rise until double. Roll out and cut into shapes (rectangles, square, circles). Spray baking sheets or kitchen table to non-stick cooking spray and then place donuts on surface to rise 15-20 minutes. Fry in medium-hot oil until brown on both sides (2-4 minutes). Let cool slightly on paper towels and then top with sugar or glazes (maple is always the favorite, trust me).

Tips:
1. Letting the dough rise for a full hour or until double is key. Letting the cut donuts rise for 20 minutes before frying is even more key. If you dough is not rising, then your donuts will be doughy and hard, instead of really puffy and soft.

2. Fry a few donut holes first to make sure the oil is hot enough. If the oil is hot enough, it will bubble around the dough right away. The donuts should take no more than 2-3 minutes per side to get nicely browned. The donuts should puff of a lot as they cook, which will make them nice and soft inside.

3. The best glaze is maple glaze. To make this, put 1/2 t of maple flavoring, 2-3 T of milk, and enough powdered sugar to make a nice glaze that you can dip the hot donut into. If you are doubting how maple could be better than chocolate, just trust me.

4. These donuts are best hot and shared with friends. A whole recipe will make around 6-7 dozen donuts, so be sure to invite enough friends over and make lots of glaze.

homemade cheese ravioli

This weekend I decided to finally attempt something I have long wanted to make: homemade cheese ravioli. I've made homemade pasta since I was 16 and has insomnia for a summer, which lead to lots of late night cooking adventures. I didn't have a ravioli extension on my pasta maker, but I thought I could just make them by hand. Hey, I've made hundreds of pot stickers and crab rangoons by hand, so how hard could it be?

First, I made a normal batch of pasta dough from the Better Homes and Gardens cookbook. This is your standard recipe, which is very basic but my favorite recipe. You can also add dried basil or other herbs to make a really delicious herbed pasta. I let the dough sit for ten minutes (part of the recipe) while I put together the cheese filling: 1 c ricotta cheese, 1/3 c Parmesan, and a sprinkle of basil and oregano. Please note that I really don't measure anytime, so this is just a guess. I added the Parmesan to make the filling a little drier, so it wouldn't get runny and then I just sprinkled in some herbs for a little color and flavor.

Then I divided the dough into four parts and rolled each through the pasta machine several times on the lowest setting, adding flour so that it wouldn't stick. Once each part was looking uniform, I took one part at a time and rolled it through each setting until it was pretty thin (setting 6) and then placed it on the counter. Once all four parts were rolled out, I took a pasta cutter that looks like a pizza cutter, but has a zigzag edge and cut each long piece of dough lengthwise, so now I had a top and bottom of the ravioli.

Using my hands I placed a small amount of cheese filling every two inches long one side of the dough and then placed the other half on top. Then I sealed off one ravioli and moved down the line, until I had little pockets of cheese in a long strip of dough. This was actually really easy to do and just required you to push around the cheese and the dough would stick to the other side. Then I used the zigzag cutter to cut apart each ravioli, so now I had square ravioli.

I placed these on my non-stick baking mat, but wax paper would also work. I put them in the freezer for a bit and then moved them to a zip lock bag once frozen. They cooked great (only one lost its filling) and tasted amazing! I might make the pasta a little thinner next time, since once you put the two layers together it was a bit thick, but overall amazing.

Tuesday, September 29, 2009

DIY projects that i adore

I am currently enthralled in all kinds of do-it-yourself projects. A few weeks ago Ben and I repainted a kitchen stool bright green to match our towels and a bedroom table blue, because I wanted more color in our apartment. Last weekend we picked up two incredibly cool chairs for our living room, and I spent the afternoon de-rusting the bottoms and cleaning the cushions. They look great in our living room and so much better after a little cleaning. I love the feeling of accomplishing something and even more the feeling of making something beautiful.


I am currently on the hunt on craigslist for some other items I want for the apartment. Here are some DIY projects that I love. They are all ideas I've seen at Design Sponge, which is my new favorite blog to read.


Monday, August 10, 2009

new york city adventures

My sister Diedra and I decided to take the bus to NYC this last Saturday to spend a day together. Since we no longer live in the same city, this was a great way to get together and also have a little adventure. We both boarded a Bolt Bus early in the morning and arrived in NYC around 10:00 am. The weather was 78 degrees, sunny, and not that humid. We couldn't have asked for a better day to visit NYC. After throwing away the terrible books we both brought with us to read (mine was a library leftover which cost me 25 cents), we headed over to the fabric district.

Our friend (and roommate over five years ago) Mel gave us some quick suggestions of where to shop while in the fabric district. Mel has lived in NYC for over the past year and has just loved it. We wanted to meet up with her, but our schedules didn't work out. Our first stop was Mood, made famous by Project Runway. There are no signs outside the building, but we had the address to find the door. You enter what looks like a building lobby and then ride this incredibly old elevator up to the third floor. The elevator was so old that a man actually had to operate it! That might have been our favorite part.


Once getting into Mood we first wandered around just to look at all the amazing fabric, and then we headed over to find some lining that Diedra wanted to buy (since we can never find the right stuff in any other fabric stores). We both found some amazing fabric that we can't wait to use.

The fun thing about wandering around these fabric stores, is that they were filled floor to ceiling with every kind of fabric you could ever want! (We even saw a section for Alpaca fabric.) We loved looking at the silks and some of the most adorable cotton prints you have ever seen. We also checked out the notion stores full of buttons and trim. I found this incredibly carved button that should be the perfect finish to a jacket I recently made.

After a few hours in the fabric district, we grabbed some great pizza, ate some delicious cupcakes, and then headed over to the Met.

The Met says that it costs $20, but that is actually a recommended donation. Most people don't know that they can actually pay whatever they would like. The first time I did this I was pretty nervous, but they actually will let you in for even $1 (which is what the guy in front of us in line paid). We walked through the Roman and Greek section, then over to Modern Art, where Diedra got approached by this man 40 years older than her who tried to hit on her, then over to the American section. Our favorite part was actually this display of original rooms from hotels and palaces in Paris, Vienna, and other cities in Europe in the 1600s and 1700s. They had dismantled entire rooms (walls, furniture, layout, lighting, etc) and rebuilt then in the museum. It was really interesting to see these complete room, some with the natural lighting, which was quite dark.

After two hours in the Met our feet were pretty tired, so we rested in Central Park and planned our next adventure. We wanted to walk through China Town and look at fake designer purses next, so we hopped on the subway. The idea of designer purses was a lot more fun that actually looking at them, since most were quite ugly. We saw a few that we liked, but not enough to actually buy. After being accosted by enough people trying to sell us stuff, we decided to walk over to Little Italy, and I found a great little pizza place to have dinner. We ordered a margarita pizza with buffalo mozzarella and basil, along with some gnocchi, which was incredible. We ate our delicious meal while our feet rested.

By this time it was practically time to head back to catch the bus, which we were just fine with. We were both really tired and were ready for a 3 hour nap. I got back to the bus 10 minutes before it left and slept the entire way back to Boston. I highly recommend taking the bus to NYC for a day trip. The ride was less than 4 hours and it was nice not to have to drive or pay tolls.

Monday, August 03, 2009

herbs de provence


A few years ago my sister Rixa bought some much beloved herbs de provence while she was in France for the summer and mailed it to me. I had been using this a lot in my cooking, and I needed more for my supply. I can't remember which mix I preferred more, but here are the two kinds she gave to me. I am on my last bit, so pretty soon I will need to make my own mix.

But for anyone who loves herbs de provence, here are the ingredients to make it at home:

Mix 1:
26% Oregano
26% Rosemary
26% Sariette (Winter Savory)
19% Thyme
3% Basil

Mix 2: (package that says "for grilling")
37% Rosemary
18.5% Sarriette (Winter Savory)
18.5% Serpolet (wild thyme)
6.5% Oregano
6.5% Marjoram
6.5% Basil
6.5% Thyme

I put herbs de provence on grilled zucchini and yellow squash, grilled salmon with mustard and tomatoes, pasta with a little bit of Parmesan, fresh french bread with olive oil, roasted potatoes with mustard and pepper....the list goes on and on.

Wednesday, July 29, 2009

things I've learned on the Boston T

I have been enjoying riding public transportation to work for almost 10 years. When I worked summer jobs at the Mayo Clinic, I always took the city bus to work and often the shuttle between the downtown campus and St. Marys. In college I never owned a car, so I rode the Provo bus to the grocery store and to run errands. In DC I took the metro to work, first when I worked in the downtown area and then in Chevy Chase. I have learned to really enjoy commuting in mass transit. I mean, where else can you take a nap, listen to an ipod, read a book, or people watch all while getting to work?

Riding the metro in DC was so delightful. DC has by far the cleanest subway system in the world (I've ridden the subway in Paris, London, Barcelona, New York, and Boston.) The trains are spacious and air conditioned. The stations tell you when the next train will arrive. It is easy to transfer from one side of the tracks to another. And except for the tourists, people who commute on the metro DO NOT TALK. This is pretty much a hard and fast rule; people like to have it quiet on the trains and I've even seen people ask others with loud headphones to turn it down.

Riding the metro (called the T) in Boston has been a whole different experience. The train lines were built at different periods, so some are nice and modern, while others are extremely old. The biggest difference is the attitude of the riders here in Boston. I'm not sure if it is a factor of the culture (Bostonians are often pretty rude) or what, but each day I learn new things. For example:

1. People like to stand up as the train is moving to get 2 feet closer to the door. Mind you, the trains are pretty bumpy and like to jerk a lot, so this ends up making other loose their footing and hit other people. Apparently waiting for 30 seconds until the train stops has never occur ed to a lot of people.

2. If you bump someone, you might get into a fight. I have already witnessed a few heated words passed between passengers, all for things like bumping them while riding or taking a photo and the flash getting in their eyes. In DC even if someone pokes your eye with their finger or steps on your toes, you don't yell at them (both of these things have happened to me and other friends in DC).

3. Yelling "I love everyone" stops fighting. Actually this is the best way I have seen a fight defused. Unabashed love for everyone kind of makes people stop yelling.

4. It is perfectly okay to crowd near the doors, making it impossible for people to get off the train or for others to get on. I think Bostonians need more training on moving to the center of the car.

5. Don't think anything of a complete stranger yelling across the car to get the attention of another passenger. One day this older woman yelled across the train to talk to another man, who she wanted to know where he grew up and then started to give unsolicited recommendations on what to see in Boston. When the other passenger tried to ignore her, she then got really defensive.

6. Eating is allowed on the T, which might explain all the rats and mice I see. Gross.

All of this makes for a pretty entertaining commute. My only regret is that I don't carry a camera with me to take photos of all the craziness I see each day.

Wednesday, July 22, 2009

kid aprons


My cousin Tiana visited Boston last week, and while she was here she decided to sew some aprons for her kids, since they are always wanting to help in the kitchen. I pulled out some random fabric I had left over from previous projects, and Tiana threw together some of the cutest aprons I have ever seen. Her son got to use some of my coveted John Deer fabric (what kid doesn't love tractors?). I'm so glad that he already realized that hammers belong in the pockets!Thanks Tiana for a great time touring Boston, eating cannoli, enjoying some of the best pizza Boston has to offer, and most importantly, getting to spend more time with you.


Tuesday, July 14, 2009

the sun dress

I finally have pictures of the adorable sun dress that I made for Ben's little niece. This was one of the first sun dresses that I attempted, while on my sun dress sewing kick a few months ago. Isn't she adorable?

I made probably over 12 different dresses, and I really need to post pictures of them. If only I wasn't a sugar momma and had more free time on my hands.....

tortillas


Last night I finally decided to tackle a food that I have long wanted to make from scratch, but usually found a reason to just buy it at the store: tortillas. Since we were out of tortillas and I really wanted to eat enchiladas for dinner, I finally bit the bullet. I looked up a few recipes online to get a feel for the recipe. I was surprised at how easy they were to make (the dough took a matter of minutes to mix together) and how easy they were to roll out. I was expecting the dough to be really sticky and want to stick to the counter, but it was really easy to handle. I've still got some work making the tortillas round, but I will consider this a great success.
Tortillas
3 c flour
1 t salt
2 t baking powder
4 T butter (or shortening)
1 c warm water
Mix the flour, salt, and baking powder in a bowl. Cut in the butter with a fork or pastry cutter. Pour in half of the warm water and mix with a fork, then pour in a small amount at a time (1/4 c, then the other 1/4 c), stirring as you go. You want to add just enough water for the dough to stick and be really soft, but not too much. Feel free to add another few tablespoons of water if you need.
Once the dough is sticking together, kneed on a slightly floured surface for just a few minutes until dough is uniform (I did this for only 2-3 minutes, if that). Let the dough rest for 10 minutes, then divide into 10-12 parts. Roll out each bit of dough on a floured surface with a rolling pin and then cook on a medium-hot frying pan (no oil or butter). Shells cook around 2-3 minutes per side until golden brown with a few spots.
A special thank you goes out to my mother for the wonderful tortilla warmer she gave me that kept these tortillas perfectly warm and moist while I rolled out and cooked each one. I just heated up a stone in the microwave for 1 minute, placed it in the container, and then put each tortilla in when it was done cooking. 20 minutes later when we were ready to eat, the tortillas were still perfect.
For you readers out there (which is approximately 3 people) who are skeptical that you can actually make homemade tortillas WHILE making dinner, it was easy. I started the dough while the chicken was cooking in the pan. Then while the dough was resting for a few minutes, I finished the chicken, grated the cheese, and set the table. Then I rolled out one tortilla and while it was cooking, I rolled out the second, all while occasionally cooking the veggies.

Tuesday, June 30, 2009

lava cake

Kalli, one of my new friends in Boston, introduced Ben and I to lava cakes over the weekend, and I was instantly in love. I've had similar ones, but they involved putting truffles in the middle of each cake. This recipe makes more a fudgy cake batter, which when cooked has a nice and firm crust and then a gooey inside. Chocolate lovers beware!

Lave Cake
4 squares bakers semi-sweet baking chocolate
½ c butter
1 c powdered sugar
2 eggs + 2 egg yolks
6 flour

Preheat oven to 425 degrees, butter 4 custard cups (or 6-8 ramekins), place on baking sheet. Microwave butter and chocolate on high for 1 minute or until butter is melted. Whisk until chocolate is completely melted into butter. Stir in sugar and whisk eggs and egg yolks, then stir in flour. Divide batter between cups. Bake 13-15 minutes until sides are firm but centers are soft. Let stand 1 minute then run a small knife around edges to loosen then turn over onto dessert dishes. Serve with ice cream, whipped cream or fruit.

Saturday, June 27, 2009

sense of accomplishment

I often talk with my best friend Jocelyn about how the small things in life really give us a sense of accomplishment. Like doing the laundry or staining the desk. Nothing feels better than working with your hands to get something done and then seeing the fruits of your labors. Even though I used to ask my mother "do I look I was built for manual labor" whenever she asked me to mow the lawn when I was a teenager, I now really appreciate the value of physical labor and the sense of accomplishment it brings.

I admit it; I love doing the laundry, doing the dishes, and cleaning the bathroom because after a few minutes you can see a real result. This morning I cleaned the bathroom and kitchen, organized our small apartment, vacuumed, sharpened the knives, filed some important documents, baked bread, and started the laundry. It is also easier to love doing these chores when you live in a small apartment which literally takes 20 minutes to clean and you are only doing the laundry for two people. I know that it will get more time intensive when our family gets bigger, but I am truly grateful for my ability to keep our home clean and organized.

I know that it is in fashion to have a maid or someone to do your housework, but I don't want to ever stop caring for my home or taking care of my belongings. I love how good it feels to do something myself and see a positive result from work.

Monday, June 22, 2009

iso new hair stylist

With all the pains of moving, one of the things that I have felt the hardest (besides being so far from all my dear, dear friends) is realizing that I need to find a new hair stylist. And by find I mean find someone willing to learn how to highlight hair so that I can get free highlights. And someone to cut my hair.

I just can't bring myself to pay money for a haircut or highlights. A) I can't afford it. B) It is overpriced. And C) I hate paying for something that I can do myself. Highlighting and cutting hair isn't that hard. I have taught probably 15 people how to highlight hair. Now I just need to determine which of my new Boston friends has the inclination to highlight my hair and get free highlights in return.

Any takers?

Saturday, June 20, 2009

my trophy wife days are over

Starting Monday my carefree days of pretending to be a trophy wife are officially over. My new job will entertain me instead of hulu, sewing, and a few new Boston friends during the day. Although I am incredibly thankful for a fantastic job in this economy, I will dearly miss the life of freedom that I have enjoyed these last few weeks. Here is a little of what I have done:

1. designed and sewed an adorable jacket: while out shopping with some new friends, we saw an adorable jacket at anthropology that we couldn't afford, but I was confident I could reproduce.

2. started weight lifting: even though I have never done this before, I have actually really enjoyed it so far. plus Ben is a great trainer.

3. explored Boston, the North End, and the Back Bay. nuff said.

4. took naps when I wanted, read lots of books, and caught up on some TV shows.

5. explored Cambridge, found the nearest public library, discovered a great discount fabric store, and tried to learn how to drive without getting lost. so far so good.

I will really miss my long days, but I am really looking forward to working in a great location in Boston with one of the best views. I guess working for the man has some advantages.

Tuesday, June 02, 2009

we moved

Since my husband is blessed enough to get into two Ivy League colleges in his life, we finally made the move to Boston last month. After quitting our jobs in DC, spending two fabulous weeks playing in Bulgaria and Rome, and then packing all our stuff, we made it to Boston. I promise to post more on our amazing vacation in Bulgaria, but for now I will share some highlights of our new city and home. 

After apartment hunting for days, we finally decided to live close to campus, and we are thrilled about our new apartment. It is beautiful, convenient, and I love being in Cambridge. We moved in last Saturday and spent the first few days literally just unpacking boxes and trying to get everything to fit. I am happy to say that everything did fit and our new apartment looks great. We still have a few pictures to hang, but it is really coming together. Ben even let me hang up the disco ball because, and I quote, "I love you, and you love the disco ball." I figure if I am cooking all the meals for two years, then I at least get to have a kitchen that makes me happy. And boy does this kitchen make me happy. For the first time we have a dishwasher and we really lucked out on the granite counter top!!!

After we finally unpacked everything, we decided to explore Boston on Saturday since the weather was perfect. We took the T into Boston and walked along the Freedom Trail to see most of the historic sites. We stopped by Fanueil Hall for lunch at Wagamamas and then walked to the North End for amazing Italian pastries. On our way back we found an open air market and bought a week's worth of veggies for $5.  The prices were incredible!

Ben is off enjoying school, so for the meantime I am pretending that I am a trophy wife (when in reality I am looking for jobs, not spending money and definitely not lounging by any pool). I do love my new neighborhood, especially being so close the the river. Boston is a beautiful city and reminds me a lot of DC. 

Tuesday, April 14, 2009

amazing chocolate chip cookies

I need to thank my friend SueZann for making her amazing chocolate chip cookies at a dinner on Sunday. They were some of the best chocolate chip cookies I have had, which is saying something because I usually don't like most that I try.

Chocolate Chip Cookies
2 eggs
2/3 c shortening
2/3 c butter
1 c sugar
1 c brown sugar
2 t vanilla
1 t baking soda
1 t salt
3 1/2 c flour
1 c chocolate chips
1 c butterscotch chips

Preheat oven to 375° F.

Combine flour, baking soda and salt in small bowl. Beat eggs and add butter, granulated sugar, brown sugar, shortening and vanilla extract in large mixer bowl until creamy. Gradually beat in flour mixture. Stir in morsels. Drop by rounded tablespoon onto ungreased baking sheets.

Bake for 9 to 11 minutes or until golden brown. Cool on baking sheets for 2 minutes; remove to wire racks to cool completely.

Monday, March 23, 2009

tropical lime torte with mango compote

My mother made this dessert at my wedding luncheon and everyone was blown away. We were serving cheese cakes and a chocolate cake later that day at the wedding reception, so my mom decided to pick something different for the luncheon. This dessert was so incredibly fabulous that I think I wanted to lick my plate clean. Please note that this recipe does take some preparation (refrigeration over night), but it is well worth the effort.

Torte
4 large eggs
3/4 cup plus 2 tablespoons sugar
1/2 cup fresh lime juice
1 tablespoon grated lime peel

1/2 cup dark rum
1 16-ounce frozen all-butter pound cake, thawed
2 8-ounce packages cream cheese, room temperature

Compote
1/2 cup water
1/2 cup sugar
1/2 cup fresh lime juice
1/2 teaspoon grated lime peel
4 large ripe mangoes (5 to 6 pounds), peeled, pitted, diced
lime slices

For Torte: Whisk eggs, 3/4 cup sugar, lime juice and lime peel in heavy medium saucepan to blend. Whisk over medium-high heat until mixture thickens and just comes to boil, about 6 minutes. Transfer lime curd to small bowl; press plastic wrap directly onto surface. Chill until very cold, at least 3 hours and up to 3 days.
Line 9 1/4x51/4x23/4-inch loaf pan with 2 layers of plastic wrap, leaving long overhang. Stir rum and remaining 2 tablespoons sugar in small bowl until sugar dissolves. Trim brown layer from outside of cake. Cut cake horizontally into 3 equal layers. Beat cream cheese in large bowl until fluffy; gently fold in cold lime curd.
Trim bottom cake layer to fit pan bottom; reserve cake trimmings. Brush layer on both sides with 1/3 of rum syrup. Place in pan; spread 1 1/2 cups lime curd mixture over top. Brush second cake layer on both sides with 1/3 of rum syrup. Place in pan; spread remaining lime curd mixture over top. Brush third cake layer on both sides with remaining rum syrup. Place on lime curd mixture; press to adhere. Press reserved cake trimmings around sides. Cover torte with plastic overhang. Refrigerate torte at least 1 and up to 2 days.

For Compote: Stir first 4 ingredients in large bowl until sugar dissolves. Mix in mangoes.
Cover; chill up to 1 day.
Using plastic as aid, lift torte out of pan and unwrap. Cut crosswise into 12 slices. Arrange slices on plates. Top with compote. Garnish with lime slices.

Wednesday, March 18, 2009

streusel kuchen

Last night I taught our monthly cooking class for Enrichment, and I decided to teach on making bread, since it is so easy to make, but yet a lot of people have never tried it. We made two batches of french bread and then two pans of Streusel Kuchen (German Crumb Cake). The recipe came from my great grandmother, and it is absolutely fantastic. You literally combine the ingredients and press it into a pan and bake.

The french bread was a huge hit! I also brought along my dipping spices, which always make bread better. After that, we talked while the Streusel Kuchen baked in the oven, and then I passed around pieces of the cake for everyone to try. We had about 30 women at the cooking class, so it was a great success.

Streusel Kuchen
3 T yeast
½ c warm water
1 c scalded milk
½ c butter
½ t lemon extract
2 eggs
½ c sugar
4-5 c flour1 t salt

Combine yeast and water and let grow. Melt butter in scalded milk. Add to yeast mixture along with the eggs, sugar, and extract. Add flour until dough is soft and still a little sticky. Press into pan and rise for 20-30 minutes. Combine sugar, flour, butter and sprinkle on top. Bake at 350 for 12-15 minutes. Glaze with ¼ c lemon juice and 2-3 c powdered sugar. Best if served warm.

Crumbles:
1 c flour
1 c sugar
½ c butter

Glaze:
¼ lemon juice
2-3 c powdered sugar

Tuesday, March 10, 2009

spring apron giveaway winner

Congratulations to Jill for being the lucky winner of the Spring Apron Giveaway! Jill will receive one custom made apron by your truly.

Jill, please email me at artnotascience@gmail.com the address you would like me to mail it to.

Wednesday, March 04, 2009

the BEST cupcakes in DC


As a baker myself, I'm usually skeptical of reports of great cakes or cupcakes. Often I have a slice of cake and think "my own carrot cake is better than this." If you are a food snob like myself (or love cupcakes), then you MUST try out Frosting, A Cupcakery.

My friend Michelle is one of the most talented bakers I have ever met and just opened her own cupcakery. Last weekend I had the pleasure of tasting her amazing cupcakes, and I was honestly blown away by the presentation and taste. The cupcakes were impeccably frosted and so delicious that I may or may not have eaten a few in one sitting. My favorite flavors were the Cookie MOMster (chocolate cupcake with almond and Oreo butter cream frosting) and Babas Baby (carrot cake with cream cheese frosting). The menu is HUGE and is full of so many delicious options.


My friend Emily also came over to taste test the cupcakes, and we both agreed these were by far the best cupcakes in DC. The shop is still not open yet, but you can order cupcakes to be delivered. If you love cupcakes, you must try these.

Tuesday, March 03, 2009

the best chocolate frosting i've ever had

I am not exaggerating that this is the best chocolate frosting that I have ever had. Thanks to Jenn Fox for introducing me to this frosting and providing her recipe. She even told me that it has been used to woo men. I'm so not surprised.

Chocolate Buttercream Frosting

3 ounces unsweetened chocolate, melted

2 ½ cups powdered sugar

1 ½ tablespoons unsweetened Dutch-process cocoa powder

1 ½ cups or 3 sticks unsalted butter, at room temperature

1 teaspoon vanilla extract

½ cup heavy whipping cream, at room temperature

Sift the powdered sugar and cocoa powder into a large bowl. Add the butter and using an electric mixer on low speed beat until smoothly blended, about 2 minutes. Add the unsweetened melted chocolate, vanilla and heavy cream, mixing to incorporate. On medium speed, beat the frosting for at least 3 minutes, until it looks smooth and creamy and the color lightens. Once the cupcakes are frosted they can be left for up to three days at room temperature or stored in the refrigerator. Makes enough frosting for one box cake or cupcakes.

Monday, March 02, 2009

arts and crafts part 2

Just thought I'd post pictures of the continuation of arts and crafts day. After lunch with my husband, I went back to sewing another dress and then an apron. It has been a really fun day using up old scraps of fabric and seeing what kind of fun things I can make. It may be snowing outside, but it definitely feels like spring.

The fabric is white with green concentric circles. I loved the contrast of the orange fabric for the pocket.

Here is a close-up of the orange bow that ties the two sides of the dress together. You can see the pattern of the green fabric here.

I've had this fantastic blue fabric with tiny white bows for awhile, so I finally decided to use the last bit to make an apron.

Here is a close-up of the cherry fabric and the blue bow fabric. Both were scraps from other projects, so I was happy to use them up.

snow day: arts and crafts

I woke up this morning at 5:45 am to the sound of my cell phone ringing. I would have been more mad, but it was just work calling saying that the office was opening two hours late. I peeped through the blinds to see a few inches of snow, jumped back in bed, and dreamed of a snow day (I'm not joking, I really did dream I had a snow day).

Ben and I woke up at the normal time and enjoyed a very leisurely morning. As I was getting ready to bundle up and head out into the snow, I got another call from work saying they have decided to close the whole day! I may or may not have done a little dance and giggled. Ben put on his snow boots and headed out the door to walk to work in this year's first winter wonderland. He also snapped the picture of us "snowed in."

After updating the blog on this weekend's activities, I pulled out the sewing machine and surger to work on some projects. And 60 minutes later I would like to share my newest creation!


Behold, the girliest dress I have ever made. Not that I don't like it (I LOVE those ruffles).


A close up of the ruffles. I added them at the end kind of as an experiment. And I love them. I don't think every girl needs to wear ruffles all the time, but it sure does make this dress fun.
A close up of the pocket with a ruffle. (Blogger sometimes likes to rotate my pictures without my telling it to. I'm not sure how to undo this, so here is a sideways pocket.)

american history museum

Ben and I love taking advantage of the free and incredible museums in DC, so this past Saturday we headed to the newly opened American History Museum (which was closed for a few years for renovations). A lot of the exhibits were the same as before (First Ladies Dresses, The Flag), but others were new.

I loved exhibit on transportation. It had really old buggies, a Ford Model T (in black, the only color it came in because black paint dried the fastest), a Roadster, and lots of other vintage cars. It was really amazing to see the changes in style over the years and also see old models that you only see in movies.

There was also a fabulous exhibit on America in war. It had great artifacts (Washington's dishes from when he was in battle) and really great displays. It reminded me a lot of the Holocaust Museum (it was also incredibly instructive), but not nearly as depressing.

The other fun part about this museum, is that it had random artifacts from American history and Pop Culture. Here is Ben with some of his favorites:


Remnants from the original Star Spangled Banner
Oscar the Grouch (who was originally created orange instead of green)
C3PO. I have to admit this was pretty awesome.

Ben and I also popped into the Natural History Museum to see an exhibit with a real Giant Squid. It was hard to take a picture of the squid in formaldehyde, so instead here is Ben with the jaws of a Megal0don (giant shark).

girl's dress: craft night success


Emily and I had our first craft night last week, which turned into a complete success. We got out a bunch of fabric that we have been meaning to use (plus some scraps) and talked about different projects we wanted to accomplish. We both had visions for some upcoming projects (I'm working on a duvet), but we needed more fabric.

So we decided to start off with a small project: making a girl's dress. We both have nieces, so we grabbed some extra fabric we had around the house and got started. The style we used is quite easy - simple a-line dress with pleats at the neck. The original picture we saw included sleeves, but we instead decided to just do a summer dress edged around the arms and neck. We also opted out of putting in a button in the back, and instead we had the edging open at one side of the neck and tie in a bow to close (brilliant idea and much easier than a button).

Emily and I were quite please with the results. We added the pockets as a finishing touch. We are planning on continuing to make more kids clothing (since they are short projects, don't take a lot of sewing skills, and really fun to create).


Here is a close up of the pleats in the front around the neck and the bow that closes the dress.

Wednesday, February 25, 2009

spring apron give away

Since every girl needs an adorable apron and spring is just around the corner, I will be giving away one of my custom made aprons to one of my lucky readers. If you would like to qualify to be entered into the drawing, please do the following:

1. Leave a comment on this post by March 9th stating how lovely my blog is and what your favorite entry has been so far. Also include your blog address.
2. Link your blog to my blog (I will also add you to my blog roll as well).
3. Feel free to add any suggestions of what you would like to see more of.

Once I have picked the lucky winner, I will email them to get a mailing address to send the apron to. Good luck to all (which I would say is pretty good since I think I have a total readership of about 8).

wild mushroom risotto

I received this recipe for a coworker who raved about it. Since I love both mushrooms and risotto, I thought I would post it for all to enjoy. I obviously won't be using dry sherry, so I'll probably substitute with a juice or something else. Now I am on the hunt for some wild mushrooms so that I can make this risotto.

Ingredients
35 ounces chicken broth
3 tablespoons butter
3 tablespoons olive oil
2 shallots, chopped
1 pound assorted wild mushrooms (such as oyster, crimini and stemmed shiitake), sliced
1 cup arborio rice
1/2 cup dry Sherry
1/2 cup freshly grated Parmesan cheese
3/4 teaspoon chopped fresh thyme

Bring broth to simmer in medium saucepan. Reduce heat to low; cover and keep broth hot.
Melt 3 tablespoons butter with olive oil in heavy large saucepan over medium heat. Add chopped shallots; sauté 1 minute. Add wild mushrooms; cook until mushrooms are tender and juices are released, about 8 minutes. Add rice and stir to coat. Add Sherry and simmer until liquid is absorbed, stirring frequently, about 8 minutes. Increase heat to medium-high. Add 3/4 cup hot broth and simmer until absorbed, stirring frequently. Add remaining hot broth 3/4 cup at a time, allowing broth to be absorbed before adding more and stirring frequently until rice is just tender and mixture is creamy, about 20 minutes. Stir in Parmesan cheese and chopped fresh thyme.

Tuesday, February 24, 2009

the cutest aprons


I've been trying to use up leftover fabric lately, which has lead to making lots of aprons. I bought a lot of adorable fabric last year, and I finally felt like it was time to use it (or use the last bit of it). The aprons all have pleats and pockets. I thought I would show some of the cutest aprons I've ever seen.

I fell in love with the John Deer fabric the moment I spotted it in the clearance bin. I'm so in love with this craft apron that I might not be able to give it away. It might become part of my permanent collection.
I love the lime green, pink, and black and white combination. One pocket is pink and one is pink with a green overlay on top (as seen above).

This photo doesn't do justice to how adorable the brown fabric is.

The blue fabric has tiny bows, which I just loved. The black and lime green combo made the blue fabric even more fun.
This photo doesn't show just how fun these two fabrics are together: purple polka dots with green stripes.

I had the red with tiny star fabric leftover from a previous project, which was the perfect fit for the blue fabric (which actually has tiny flowers and stars in white).

Most of the aprons are created out of me picking two random fabrics and just making it work. I had leftover lime green fabric and some yellow that needed to be used up.

Monday, February 23, 2009

wednesday night craft night

My dear friend Emily suggested that we start a regular craft night to (a) help us finish all those projects we have been meaning to and to (b) add some more activity into our lives. I thought it was a great idea. Now that stack of fabric can turn into something really fun and I can use more of the leather I received. I actually have a lot of scrap fabric that I have been trying to use up on projects, so this will be the perfect thing.

Emily is also going to take some vintage patterns from her house so that we can start learning how to make kids clothing, which I think sounds like a fantastic idea. It will be a great way to perfect sewing in zippers, doing hems, and making clothes, plus we can make adorable dresses and send them to our sisters or friends!

And when I say craft night, this isn't a guise for getting together with friends to talk. We will be doing hardcore projects and getting things done! Let me know if you want in on the fun.

russian winter

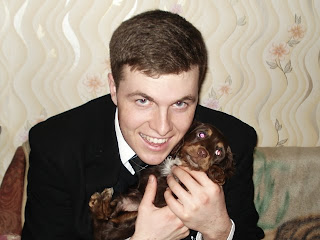
My brother sent some pictures of the winter in Russia. He has been lucky to be in the southern part of Russia, so he doesn't have to deal with the crazy winters in Siberia. Above is huge ice cycle that he found and apparently started to eat.


The beautiful view from his bus stop. Doesn't this make you want to visit?


Garrett enjoying the winter. I'm not sure what this pose is all about. I'm going to chalk it up to being a missionary thing.

This is my favorite picture to date!! Is he snuggling with the puppy or about to attack? I'm not sure. The puppy doesn't seem to be enjoying this as much as he is.